|

| A Harp Repair of a Cracked T-brace Oh my gosh! I knocked over my harp! We've heard that before, and well, it happened to me the evening of July 4, 2008. Dave and I were awaiting the fireworks, playing harp and guitar out in the backyard when, oh my gosh, I knocked over my harp! The knee block (where the neck rests on the soundbox) moved sideways about an inch or so which I think helped cushion the blow. Dave was easily able to knock it back into place with his fist. The T-brace cracked vertically a little over a foot and a half. Oh, I felt bad!!!! I hugged my harp, gave it Reiki, and off we went for the fireworks display downtown. The next day, I asked Dave if I could do this repair so I could console and encourage our customers when it happened to them. So with camera in hand, we proceeded to repair my T-brace crack. Here are the pictures that show the steps involved.
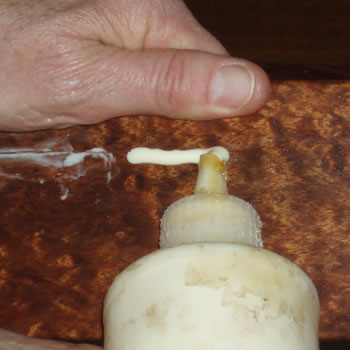
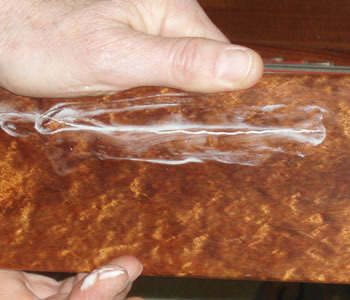
In order to get the glue (Titebond) inside the crack, you have to pull the wood apart so the glue can get in there. Don't be afraid. If you lay the harp on it's back, gravity will allow the glue to flow into the crack as you pull the wood apart.
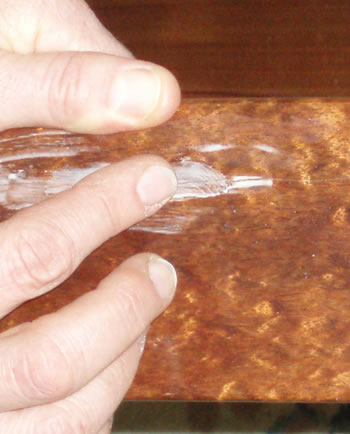
Spread the glue up and down the crack with your finger. You may have to reapply another bead of glue farther down the crack, and keep spreading the crack so the glue will flow inside it. Be careful not to get glue on any other places of the harp with your gluey finger.
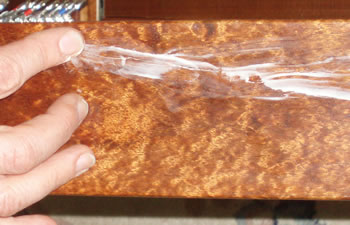
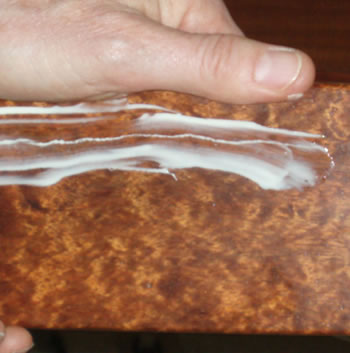
Now push the wood together and see if the glue sort of beads up as the wood squishes the glue back out. If this happens, then there is enough glue inside the crack.
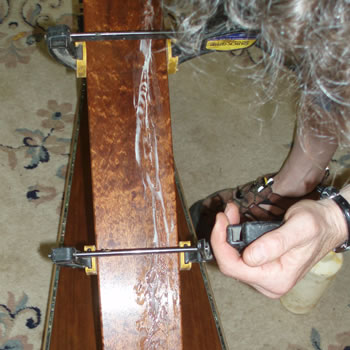
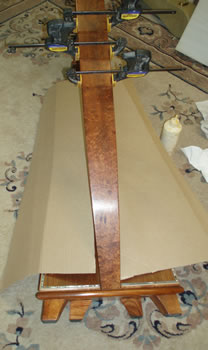
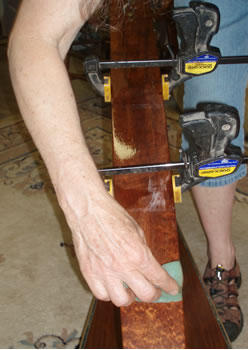
Now using clamps with rubber pads, clamp the T-brace on the edges. Not too tight because you don't want to create dents in the wood. But just tight enough to hold them. As I was doing this, I dropped one of the clamps on my soundboard. Luckily it did no damage, but in retrospect, it would be a good thing to protect your soundboard with cardboard or blankets or something, just in case you drop a clamp like I did. (see photo on the right.)
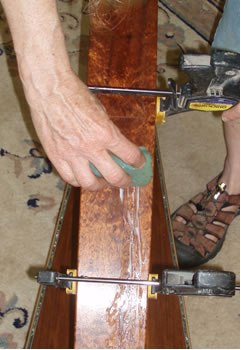
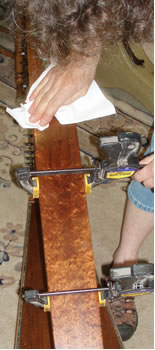
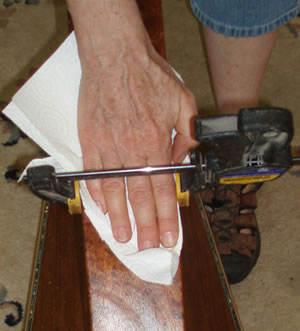
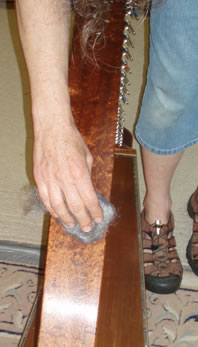
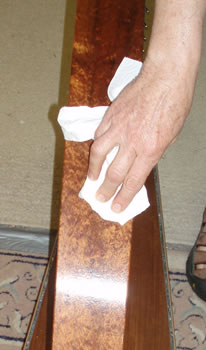
Now wipe up the excess glue with a lightly damp sponge...
and quickly follow it with a dry paper towel. Leave the clamps on for about 1-2 hours.
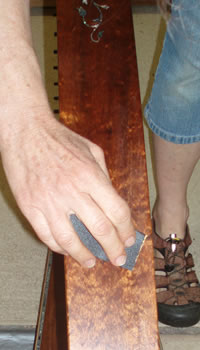
If everything is flat and smooth, you're done. If you can feel a ridge, it is probably the glue line. Take some 320 grit sandpaper and sand lightly. You don't want to go through the lacquer finish. When it feels pretty smooth, take some triple 000 steel wood, and rub the crack lightly but firmly. Then wipe it down with a dry paper towel. It should be pretty much good as new. At certain angles, I can see the crack, but I can't feel it and it looks great. If I can do it, you can too!
|
|
Thormahlen Harps
| 1876 SW Brooklane Corvallis, Oregon 97333 | (541) 753-4334 | harps@thorharp.com |