|  Our Shop
In our home workshop in Corvallis, Oregon, Thormahlen Harps consistently
produces some of the world's finest lever harps. As a craftsman, I appreciate
a pleasant work environment. My assistant, Tommy Nunn, and I work in
a well equipped woodworking shop. There are lots of windows for natural
light, a wood floor for those busy feet and a centralized dust collector
to keep the air breathable. We have 2 other rooms, one, we call our
"studio" which is also our showroom. This is where we string and lever
the harps, and store most of our lumber. The other room is called the
"harp room" where we keep the harps safe and sound and pack the harps
up for shipping. We would dearly love to have you come and visit us,
get a tour of the shop and play some harps. It is best to make an appointment
so we know you're coming and we are sure to be home. We'll also have
the harps tuned up and ready for a workout. Hope to see you!
- Dave Thormahlen
On June 1, 2006, Oregon Public Broadcasting aired a 8
minute interview and tour of our shop on Oregon Art Beat. We were
very happy with what they could show in 10 minutes after 4 hours of
filming.
The Thormahlen Harps Workshop:
The Making of a Harp |
Oregon Art Beat, from the Oregon
Public Broadcasting Television Station, came to our home
and shop in October of 2005. They filmed 4 hours of what
happens here at Thormahlen Harps and condensed it into an
8 minute video clip that aired June 1, 2006. We hope you
enjoy learning about our harps from this video. Time: 7:48
The tunes played in this video are as follows:
22: Confluence (from the book Gossamer
Gate book)
2:31 Song for a Whale (from the book A
Rose In Winter)
6:33 Sunstream (from the book Gossamer
Gate)
|
|
See the Art Beat crew filming our segment
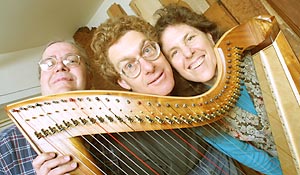
Watching a Harp Come
to Life - by Sharon Thormahlen
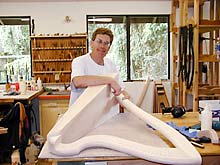
Watching a harp come to life is a pretty impressive process. I have
been in awe of it ever since I watched Dave make his first harp in
1984. Let me tell you what it’s like. He starts with this “big
ole” hunk of wood. Usually a board about 8 to 12 feet long,
6 to 12 inches wide and as thick as 3 inches. It has saw blade marks
on it and jagged edges, as it has just come out of the mill. He lays
out his plywood templates much the way some of us would lay pattern
pieces on a piece of cloth to make an item of clothing. He attempts
to get the prettiest parts of the wood in just the right places and
at the same time getting the most out of each board. Using some big
and loud machinery, that the cat runs away from, he begins to
shape the harp into harp parts. Then he takes each piece and fillets
them, opening them up like a book to get perfectly matched pieces
to use for the back, sides, and neck. They call this resawing.
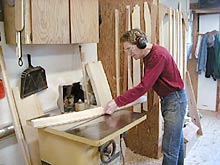
 The next process is thickness sanding. Tommy, Dave’s helper,
will stand at the thickness sander for hours, and sometimes days sending
all the parts through many times, gradually thinning them to just
the right thickness. He will set some old issues of the Folk Harp
Journal, Frets Magazine or The Guild of American
Luthier’s Journal on top of the thickness sander and read
away as he passes the wood through the machine. Good use of time!
The next process is thickness sanding. Tommy, Dave’s helper,
will stand at the thickness sander for hours, and sometimes days sending
all the parts through many times, gradually thinning them to just
the right thickness. He will set some old issues of the Folk Harp
Journal, Frets Magazine or The Guild of American
Luthier’s Journal on top of the thickness sander and read
away as he passes the wood through the machine. Good use of time!
Dave and Tommy take about 2 weeks
to make these “sets” which they will be using for the next
3 months for upcoming orders. When we have visitors in the shop, they
almost always comment on the smells from the wood. Dave and Tommy are
so used to it, they hardly notice the sweet smells of cherry and mahogany
or the pungent aroma of redwood and cedar. Tommy’s wife, Tina,
often can tell when they have been working with walnut, because Tommy
comes home smelling like a barnyard and usually takes a lot of dark
colored dust home with him. I try not to complain about the dust and
glue that Dave tracks into the house. There’s usually a little
pile of wood chips under his chair after he’s come in for lunch.
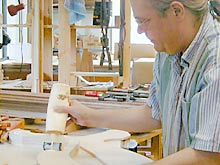
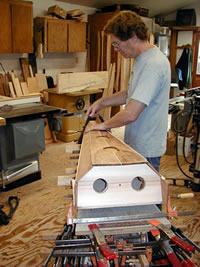
With each step the harp comes
more and more to life. This next step is when it really takes shape.
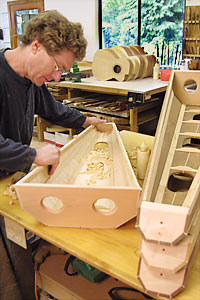
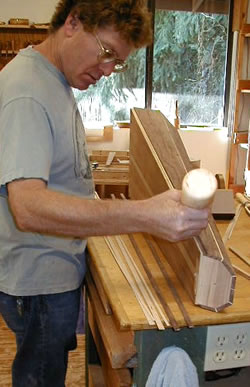
For the Swan, Cygnet, and Clare harps, Dave places the 5 staves
on a mold and sets a piece of contrasting trim between each piece.
(See photos below.) These 5 pieces make the soundbox. You really
get a feel for the way the harp is going to look when this step is
completed. He then braces the joints on the inside, cleaning up the
glue so it looks as neat and tidy on the inside as it does on the outside.
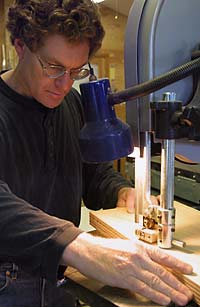
Tommy, in the meantime, is putting together necks, pre-sanding the
neck and pillar and drilling all the holes in the neck that will later
hold the tuning pins.
 Another step in the process is making the sound boards.
Boy, what a job that is. Starting with a piece of wood that you could
just as well throw into a fireplace, Dave slices it thinly like a
hunk of cheese. He then edge glues the soundboard with these trapezoidal
pieces of wood are anywhere from 8-16 inches wide, 4-8 inches
tall and 1/2 inch thick. After the
glue dries, he puts them onto a rack in the drying box to get the moisture
down to 7-8%. This helps the instrument survive in lower humidity climates.
However we must never forget that wood continues to dry out, and we
must keep those humidifiers going and our harps away from heaters,
air conditioners and sunny windows. Another step in the process is making the sound boards.
Boy, what a job that is. Starting with a piece of wood that you could
just as well throw into a fireplace, Dave slices it thinly like a
hunk of cheese. He then edge glues the soundboard with these trapezoidal
pieces of wood are anywhere from 8-16 inches wide, 4-8 inches
tall and 1/2 inch thick. After the
glue dries, he puts them onto a rack in the drying box to get the moisture
down to 7-8%. This helps the instrument survive in lower humidity climates.
However we must never forget that wood continues to dry out, and we
must keep those humidifiers going and our harps away from heaters,
air conditioners and sunny windows.
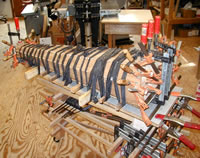
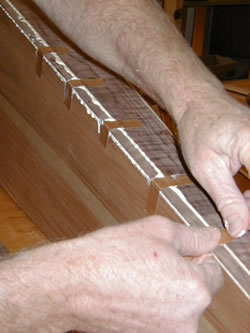
The soundboard then gets glued onto the box and the rest of the trim
work goes on the harp. This sets off the contrast between the colors
of the wood, and you really see the beauty of this new
instrument taking hold. (See photos below.)
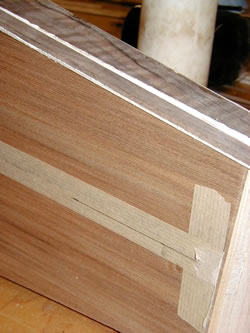
After the box is assembled, Dave glues the neck and pillar together
and adds the T-brace on the pillar. This helps increase the strength
of the neck and pillar which is forever being pulled by the tension
of the strings.
When all this is done, Tommy
takes these 5 harps worth of parts home for a week, sanding 1 a day
for 5 hours or more each. When they come back, Dave goes over them
with a fine toothed comb (or should I say a piece of fine sandpaper)
and does his quality control thing. This has a direct relationship
to the finished quality of the harp.
Oh boy, spray day! Have
you ever taken a rock from the river that you think is so beautiful,
put it in your pocket only to wonder what you saw in it after it has
dried? Well, this is the opposite effect. When Dave sprays the wood
with lacquer (at which time he is wearing a huge space-like helmet and
suit) the harp's wood grain becomes something to behold. Every variation
in color that the tree produced in its wood comes to life. The quilted
clouds of the maple, the straight lines in the mahogany, the rich, bold
color of the bubinga and rosewood, the dark walnut and the swirly cherry
makes you think of the best dessert tray you’ve ever seen. What
a treat!
Orchestrating all these steps
is like a complicated dance. Dave is always trying to stay one step
ahead of Tommy. In order to keep him busy, Dave has to get certain
things done before Tommy can do what he needs to do. Dave has been
known to get out of bed at 9pm (yes, we are in bed reading by then,
if not sleeping) to do one more glue up, so that in the morning things
are ready to go.
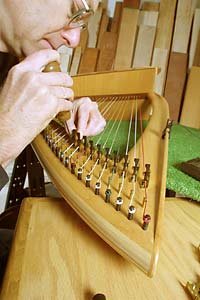
Stringing Day! One of our favorites.
This is where I get to start helping with more than the office work,
ordering, and phone calls. Dave rubs out the finish with steel wool
of all things. I wouldn’t want to get very close to my harp
with steel wool but believe it or not, that’s what woodworkers
use when they are rubbing out the finish. Tommy sets in all the pins
and pegs and just after lunch the harps are ready for me to start
putting the strings on. It takes all day to string up 5 harps and
about 2 weeks to get them to hold a pitch long enough to get to play
them. Tuning, of course, is my job. Once or twice a day I give them
all a tuning.
One of the most fun parts of tuning is when they do finally hold
their pitch, I can play a little song on each one as I go through them.
Sometimes this is the most practice I get in a day. I have even written
a couple of tunes as I was “working” the harps. I wrote
“A Mossy Glade” on Ziggy’s new harp, and “The
Last Goodbye” I wrote on Varyanna’s new harp. It’s
so great to see how each harp sings to us. I feel lucky to get to my
hands on so many different harps every month.
After tuning for 2 weeks, it’s time for Dave to start levering.
By this time, the strings have stretched and somewhat stabilized enough
to regulate the harp's levers. He’s got this down to a science.
He spends about an hour and a half putting the Camac levers on each
harp making sure he is putting the levers in the right place. After
the levers are put on, I go through each harp making sure the levers
are working just right.
At what point do we feel that the harp
is actually a harp? When is its birthday anyway? For
me, the stringing day is probably the most significant step. However,
it’s
not really complete until the levers are on. Then it’s ready
to ship out. By this time Tommy’s probably just bringing back
the next batch of 5 harps that he’s sanded and Dave will be
once again suiting up for spraying those harps and seeing the wood
grain emerge. The process just keeps circling around, and it’s
wonderful every time.
"Watching a Harp Come to Life"
Printed in Folk Harp Journal, June 2001
by Sharon Thormahlen
 Check
out the Thormahlen Harp family. Read about Dave
or go directly on to the Lever options page. Check
out the Thormahlen Harp family. Read about Dave
or go directly on to the Lever options page.
|